Sunday, December 6, 2015

KX139 Supremacy Suit & KV128 Stormsurge VS 3000 points of Dark Angels

This is my second game playing with the new KX139 Supremacy Suit aka "Gypsy Danger" and KV128 Stormsurge. In the first game (batrep will be up soon) the KX139 did well but the Stormsurge was blown away by grav weapons from a deep striking veteran in the first turn and I didn't get to do anything with it. We were both curious to see how much damage the two models can do when deployed properly (and as they are supposed to be in the fluff). For this game it was simple, kill or be killed. Game set up.  photo WP_20151206_16_46_26_Pro_zpsc0dtiimf.jpg I deployed my two suits at one end of the table and my opponent deployed at the other end. We rolled off and I got to go first and my opponent failed to seize the initiative. Tau turn 1 I deployed the anchors on the Stormsurge to get the bonus attacks for the next few turns. I open up with the stormsurge and target the rhino's in the centre field and glances two rhinos. The SMS and cluster rockets are out of range of anything else and I want to save the 1 shot missiles for a later turn. The KX139 opens up with the pulse ordnance multi-driver by targeting the group of vehicles coming up my right flank. I score a direct hit with the 7" blast and glance a rhino and blow up two razorbacks. The tri-axis ion cannons shoot at a squad of assault marines and kill 5 of them. Dark Angels turn 1. My opponent, moves all his vehicles and troops flat out up the board. The devastator squad with missiles comes out of the ruin on the right flank to get their missiles into range. The other devastator unit with lascannons stays in the ruin on the other flank. The snipers put 1 wound on the KX139 as does the devastators with lascannons. The missile squad fails to wound the KX139. Tau turn 2.  The Stormsurge went first and started off with the cluster rockets and I roll 25 shots and put 7 wounds on the assault marines. The large blast gets two direct hits on the missile squad and obliterates the squad.The SMS are still out of range and I choose not to fire the 1 shot missiles. The KX139 opens up with the pulse ordnance multi-driver and knocks out another tank. The first tri-axis ion cannon kills the chaplain and the second cannon kills 5 more assault marines. Dark Angels turn 2 All the reserves come in, my opponents dark shroud mishaps and I place it at the end of his deployment zone. Continuing on from the first turn all the tanks push up. The lascannon devastators put 1 more wound on the KX139 and the snipers fail to wound it. The knight crusader shoots at the KX139 with the battle cannon which scatters wide of both suits.  photo WP_20151206_17_06_52_Pro_zpsbgswvvbf.jpg Tau turn 3 The stormsurge shoots the cluster rockets and gets 38 hits on the ravenwing bikes and kills 2 of them. The large blast scatters off the initial target but the second shot is a direct hit causing 2 glances hits on a tank, blows up another tank and kills 4 marines. The SMS firing twice puts 6 wounds on a bike and kills it. The 1 shot missiles put 3 hull points on the knight. The KX139 shoots the pulse weapon's bombardment pattern at the ravenwing bikes and kills 4 of them. The arms kill another 5 marines.  photo WP_20151206_17_23_53_Pro_zpsq3szbgzs.jpg Dark Angels turn 3 Everything pushes up, my opponent's librarian puts 3 wounds on the KX139 and suffers perils of the warp, injuring himself. Marines rapid fire their bolters at the stormsurge and fail to wound it. Plasma and fire from the assault cannon on the razorback puts 2 wounds on the surge. I had forgotten about the 4+ invul save for the KX139 so I roll to see if I could get some back and the KX139 has taken only 3 wounds. The veterans with grav weapons but 8 wounds on the KX139 and I save 5 of them with FNP, melta shots from the bikes puts 2 wounds on it and I make the saves. The lascannons finish off the KX139.  photo WP_20151206_17_30_55_Pro_zpsr93cnwm2.jpg The game ended in turn 3 because the store was closing soon and we'd only have gotten halfway through turn 4. We reckon the surge would have obliterated the squads in front of it, leaving only the knight and lascannons to hurt it. The combined firepower from the two units killed half of my opponents army in 3 turns without marker light buffs. If used correctly the stormsurge is very effective as is the KX139. They are definitely hard to kill but grav/melta/lascannons will hurt them.

Monday, September 7, 2015

Tau V Relictors 12-0 win

Commander Shadowsun and her Cadre were taking a much needed break from the intense fighting with the Dark Angels. Her forces had landed on an agri planet to carry out repairs and to recon the planet for valuable resources. Their long range scanners and recon drones returned from their scouting missions and found no significant signs of life. They were all alone expect the herds of local fauna that roamed the great plains. The Tau had temporarily moved into a ruined stone structure, Shadowsun and her commanders had convened in a ruined tower. The rest of the battle hardened forces had stayed close to the ruins, the firewarrior teams were honing their skills by searching the buildings and using the indigenous bovine-like creatures as target practice. Beyond the ruins, hills rolled for mile after mile. Among the hills the blood thirsty Relictor forces slaughtered the local creatures. In the ruins a number of stray bolter rounds blew chunks out of the eon-old structure. Shadowsun peered over a wall and saw a raiding party of grey and black armor clad marines rumbling over the hills towards her unit. Deciding against an immediate lightening strike with her bodyguard crisis suits Shadowsun held her unit back until the right moment. Below her; missile-like rounds continued to blow chunks out of the walls while well-timed volleys of pulse rounds zipped across the plains and ripped into the marines. Relictors Turn 1 All of the marine units move up to try remove the Tau's range. A Riptide takes fire from a predator tank in the middle of the battlefield and takes a wound which is saved by the invul save. A land raider that was coming up my right flank shoots at the broadsides in the ruin on my right flank and fails to hit anything. All the other units run in the shooting phase. Tau Turn 1 I move the piranhas into a better position to shoot at at the assault marine unit on my left flank. Both Riptides move up into firing positions. The two Hammerhead tanks move around the building on my right flank to shoot the land raider, aware that it might be full of terminators. The piranha's fusion guns obliterate a chaplain in the assault squad. The heavy burst cannon on the riptide buffed by the pathfinders' marker lights kills 3 assault marines in the same squad. The broadsides in my centrefield wreck the predator with glancing hits from the heavy railguns and high yield missiles. The first hammerhead fails to damage the land raider and longstrike scores an immobilizing hit on the vehicle. Relictors Turn 2 Hoping to get into close combat before being devastated by another hail of rounds the surviving assault marines continue to move up my left flank. The enemy warlord and his unit of marines move up and over the hill. The terminators get out of the crippled land raider which shoots at longstrike and fails to penetrate the tank's hull. A devastator squad near the wrecked land raider fails to kill a broadside. A plasma gun in the ruin on my left flank fails to hit the iontide. Marines in the centre shoot at the piranhas and fail to damage the skimmers. Tau 2 Sensing a perfect time to spring her trap Shadowsun and her elite crisis suits and another commander jump into the fray. I nova charge both riptides. The firewarriors in the ruin on my left flank shoot at the assault marines and fail to wound, the piranhas kill 2 more with blasts from their fusion guns. The iontide's nova charged weapon kills 3 marines in cover with the nova charged weapon, the other 6 marines in the unit are saved by 6 cover save. The heavy burst cannon buffed again by the pathfinders kills 4 more assault marines on my left flank killing the unit but I get hot and take a wound. The Commander's crisis suit and its body guard kills 3 marines on the hill with plasma. Aware of the devestating firepower on the down but not out land raider Longstrike takes another shot at the tank and knocks a lascannon off the tank. Shadowsun takes aim at the crippled tank and obliterates it with a single fusion blast from close range. A firewarrior team on my right flank shoot at the disembarked terminators and fail to wound. The broadside unit that killed wrecked the terminator puts 2 wounds on the enemy commander. The Riptides move up and shadowsun moves back into cover. Relictors 3 The Relictor assault marines that were in reserve come on my right flank. I choose not to intercept them so I can target priority units in my turn three. The HQ breaks away from his unit and moves in the direction of the iontide. The marines move closer to my commander crisis suit. The marines in the ruins take aim at the piranhas and fail to damage them. A plasma blot from the same unit penetrates the nearest skimmer but jink saves the day. A krak missile from the devastator squad kills a broadside on my right flank. Bolters fail to wound the two surviving broadsides. The terminators from the wrecked land raider put a wound on shadowsuns bodyguard with the assault cannon. The assault terminators that came in run towards the tau lines. Tau 3 I move the piranhas flat out up my left flank to secure linebreaker and get into a firing position on the remaining marines in cover. Both riptides fail to nova charge their weapons. Both Hammerheads shuffle around to target the assault terminators, shadowsun moves out to shoot the terminaators. The riptide moves up to the centre field. The Iontide stays on my left flank. Commander and his bodygard push to my left to take aim at the HQ. Pathfinders light up the HQ, the bodyguard buffed by the scouts kills the HQ with plasma shots. The Commander kills 1 marine with plasma and 1 with the ion blaster. The iontide scatters the ion blast and hits nothing. The firewarriors in the ruin on my left kills 1 marine in cover. The heavy burst cannon kills the marine with the missile launcher in the building. Longstrike's burst cannon kills an ass terminator then fails to hit a terminator with the solid shot. The other hammerhead kills 1 marine. Shadowsun and her bodyguard fails to kill the ass terminators, the missile side kills 2 more marines in the open. I move all of the suits move up into aggressive positions. Relictors 4 The assault terminators move towards longstrike, and the other terminators move up. Termies shoot at the broadsides who save the wounds, the assualt cannon puts 2 rends which are saved. Commander takes 2 shots from the ruin and saves them. The assault terminators try to charge longstrike and 2 die from over watching broadsides, the survivors fail to get into combat. Tau 4 The iontide hurts itself with the nova charge and the other riptide successfully nova charges. The piranhas don't move. Shadowsun gets closer to the terminators. The firewarriors in my left flank kill another marine in cover. The commander kills 2 more with plasma and 1 with the ion blaster. The bodyguard kills 2 more with plasma. Piranhas finish the unit with a volley of fusion blasts. The iontide finishes the squad in my center field with 3 ion accelerator shots. The other riptide fails to kill anything with the nova charged heavy burst cannon. Longstrike wounds a terminator with a solid shot which makes its invul. Shadowsun and her unit kills 4 terminators with plasma and fusion blasts. The broadside team kills the surviving terminator with a hail of missiles. Relictors 5 In a desperate last charge the assault terminators moves towards shadowsun. Bolters from the ruin shoot at shadowsun and fail to wound the unit. The assault terminator gets into combat and is killed by a bodyguard before getting a chance use the thunderhammer. Tau 5 I fire everything into the unit in the ruin and finish it off with a volley from the broadsides and hammerheads. I won the game with first blood, slay the warlord, line breaker and scoring victory points by killing units. Picking a stand out MVP of this game is difficult since so many units played very well. The buffed riptide (Rippy) did really well but the Crisis Commander and his bodyguard did very well by killing the warlord and slaughtering numerous marines.

Monday, August 10, 2015

Tau V Dark Angels 1700 points

Smoke and steam bloomed out of the forest of chimneys in the manufactorum district of the city. The pathfinders moved into a bombed out building and set up a look out position in the top floor. Shadowsun and her forces, fresh from conquering another planet moved into the ruins, advanced into the sector. Across from their position the dark angels had set up key defensive positions over looking an open expanse in front of the Tau forces. A broadside team took up a position in the upper floors of a ruined building. Another team took up a position in the lower levels of an adjacent building. Longstrike's hammerhead moved up an abandoned street. All of a sudden a drop pod came screaming out of the muggy sky and crashed into the street infront of the tank. The battle for the manufactorum on Junkatta had begun.

 The armies deployment  photo WP_20150726_11_40_01_Pro_zpsoofrilfz.jpg  photo WP_20150726_11_39_55_Pro_zpsa6qnjtyh.jpg Dark Angels turn 1

 My opponent moved all of his tanks towards my lines and a drop pod arrives in front of the hammerhead. In the shooting phase, one of my opponent's plasma cannon's got hot and killed the marine. The broadsides in the centre building take fire from a squad of marines in the open and which fail to wound any of the broadsides. A turret mounted lascannon hits a riptide in the centre building whih fails its feel no pain and cover save. A turret-mounted twin-linked assault cannon shoots at a pair of piranha's in the open and glances 1 of them. The riptide in the centre building takes another hail of bolter fire and plasma bolts from an adjacent building and all the shots miss. The same riptide becomes a target for the devastators who fire their lascannons at the suit and takes a single wound. On my left flank another riptide takes a hail of sniper fire from the building opposite it and the suit takes 7 wounds and makes 5 cover saves and 2 feel no pain saves. The veteran squad disembarks the drop pod and fire their melta guns at the hammerhead and 7 failed to hit the tank and 1 failed to damage the skimmer, a second shot was saved by a jink and the third shot went through and damaged the tank.

 Tau turn 1

 I nova charged the riptide on my left flank and move the piranha's up. The pathfinders in the ruined building on my right flank glanced a predator with their rail rifles. The piranha's that moved up shot their fusion blasters at the tanks and failed to hit them. The veteran unit in front of the hammerhead quickly became my priority. The riptide in the centre building opened up at the vets and killed one with a plasma shot. The broadsides in the building on my left flank shot at the veterans and killed 2 more of them. A 6 man squad of firewarriors behind the tank finished off the unit and a second unit of firewarriors kill 2 more vets. The riptide on my left flank opens up on a rhino and glances it. The table at end of turn 1  photo WP_20150726_11_47_17_Pro_zpswjuv1qhj.jpg Dark Angels turn 2

 Another drop pod lands behind my lines on my left flank near the riptide. The tanks keep advancing. In the shooting phase the veterans got out of the newly arrived drop pod and set the sights of the grav weapons on the riptide. Between failed shots, feel no pain and invul saves the riptide only took 1 wound. The broadsides in the ruin were less fortunate and the missile side got obliterated and another suit took a wound. The riptide becomes the centre of attention again and takes 7 hits from snipers and saves them all with 6 armour saves and 1 Feel no pain. On my right flank the assault marines led by a chaplain kills a pathfinder. The devestators target the riptide in my centre field and kill it with lascannons. The assualt marines try to charge the fire warriors and loose one marine and fail to get into combat.

Tau turn 2

 Most of my reserves come on, needing to do a lot of damage in this turn I keep my units where they are to maximize the amount of shooting. On my right flank the firewarriors, lead by the fireblade took advantage of the pathfinders marker lights and obliterate the unit of assault marines and chaplain with 20 pulse rounds. The broadsides in my centre field kill marines that had gotten out of a rhino. The other unit of broadsides finish off the surviving veteran. Combined fire from the nova-charged riptide and fire warriors kills all of the veterans that had arrived in turn 2. The commander and his body guard kill 4 marines with plasma fire.

 The fireblade leads his firewarriors against the assault marines  photo WP_20150726_13_09_54_Pro_zpsrfbyxvjg.jpg The table at the end of turn 2  photo WP_20150726_13_09_45_Pro_zpshkrec0es.jpg The assault marines on my left flank move up along a wall and shoot at the commander's unit and fail to wound. The marines on my right flank shoot at the fire warriors and the fireblade and fail to kill any. The snipers continue their shooting at the riptide which is hit by 10 shots and 7 of which fail to wound, 1 armour save and 2 feel no pain prevent any damage to the riptide. Support fire from the fire warriors and overwatch from the broadsides kill 5 assault marines that were trying to charge the broadside.

 Tau turn 3

 Shadowsun and her bodyguard arrive on my right flank to address the number of tanks. The pathfinders once again buff the fireblade's unit on my right flank and shoot the marines and kill 3 marines. Longstrike fails to kill hit another tank but a gun drone knocks a wound of a captain that had survived the overwatch when his squad charged the broadsides. The braodsides on my right flank finish off the captain and the commander's unit kill another unit. The other unit of broadsides finish another unit. Shadowsun obliterates a tank and her unit kills 2 more marines.  photo WP_20150726_13_56_31_Pro_zpseqmpsx7p.jpg Shadowsun and her bodyguards prepare to kill some vehicles.

 Turn 4

 Unfortunately the note book that I take my notes in got wrecked and all of turn 4 and part of turn 5 got wrecked.

 Tau turn 5

The commander and his bodyguard had advanced up the board to the ruin in my opponents centre field to get line breaker and push my opponent off an objective to turn the game in my favor. The bodyguard died in turn 4 and the commander killed off some scouts and more fire from the riptide killed 4 marines. The last marine was killed by the railguns on the broadsides.

We drew on points scored, the objective that I had been chasing at the end of game turned out not to be a scoring point and in this campaign in the event of a draw the game is decided on kill points which I won 10-3. Longstirke had a terrible game by failing to kill a single marine. The riptide on my left flank (rippy) was MVP. The deep striking units were really key in this victory as the killed 5 units between them.

Monday, May 11, 2015

Building the Swordfish

In this post I'll be discussing how I built my Swordfish super heavy tank. I always wanted a heavier tank for the Tau (hint hint GW) and enjoy scratch building units, its a nice break from gaming. I always had an idea of a hammerhead-like tank with a longer body, a larger main weapon and potential transport capability. I messed around with a few idea's on paper and after doing some googling I found a design that I really liked. One idea I found, I like the weapon system but it looks a bit top heavy and doesn't strike me as a super heavy.  photo Sword.jpg I found this one online and it was similar to the concept that I had in my mind. Tau 40k Swordfish photo imagejpg1_zps96acaadd.jpg I bought a hammerhead and devilfish kit from a local gaming shop and a few bits on ebay namely a second railgun, skyray missile system and piranha engines. Before I started building the vehicle I did a mock up and wrote out step by step instructions on how to build the tank. I didn't want to make a mess of the build as the two kits and bits were expensive. I started by building the hull of the two tanks, the devilfish hull is the front of the tank as it has the burst cannon in the nose, I left the rear entry door off the tank. Once the two hulls were assembled I measured up the transport compartments and slowly cut the hammerhead hull in two pieces. I cut just behind the cockpit section, above the side entry doors.Once the cut was done I cut the engine mounts off the devilfish and glued the two hull sections together. Before I began sculpting with green stuff I reinforced the two hull sections with pieces of the sprue. I slowly built up layers of green stuff and once the sculpted green stuff was flush with the plastic I sanded it down to make it smooth.  photo Swordfish WIP 1_zpsggsento7.jpg I changed my design and mounted the smaller engines under the wings on the front. I didn't like the idea of two set of main engines, which would block the side entry door and the exhaust of one engine would be blown into the other engine. To build the main guns I assembled the skyray missile system and cut the wings down. On the front of the wings there are little notches, I made the cuts on the third one. The guns themselves are a combination of the hammerhead railguns and riptide ion accelerators. I cut the barrels off the ion accelerator and glued the long thing parts of the railguns to the ion accelerators. Then I cut the flat square parts off the railguns and glued the ion accelerator barrels to the railguns. I glued drones onto the sides of each gun and on the rear of the guns I glued the box part of the railgun to make it a little more balanced looking. Once the main gun was built I decided to put the spare skyray system together so I can interchange the two weapons.  photo Swordfish WIP 4_zpsv4q6bb9v.jpg I stuck a few of the bits to the tank to finish it off, theres a shield generator on top of the tank infront of the large missile system, sensor spines on either side of the tank and the tank command parts on the front. The finished tank.  photo Swordfish WIP 9_zpszmp2fmvn.jpg I've played one game with the Swordfish and it suffered from new model syndrome and only killed a tank and a few marines. I looking forward to playing a few more games with it. Batrep with the Swordfish http://40kabeginnerstale.blogspot.ie/2015/04/tau-v-dark-angels-2000pt-game-loss-13-7.html

Tau V Dark Angels 2000 points13-6 win

I got great feedback from the people who read my previous blog (Tau V Dark Eldar: http://40kabeginnerstale.blogspot.ie/2015/04/tau-v-dark-eldar-2k-win-13-3.html) they all really liked the fluffy intro to the battle report which went with the flow of the game. In this game we see the Tau, lead once again by Shadowsun engaging with the elite warriors of the Dark Angels. Intro In the months after the raid by the Dark Eldar, Shadowsun and her cadre had learned to keep a watchful eye on the sensor screens, at both planetary and stellar levels so that they were able to repel any potential invaders. The battle with the Dark Eldar had shown tenacity and daring that up until this point, the Tau hadn't encountered. On the planet trading between the Imperial citizens and the Tau was booming. The Tau water caste had built advanced irrigation and mining systems for the local inhabitants and in return the Tau had bimonthly transporters exporting rare metals, food produce and other items back towards the Tau's home planetary system. It had taken weeks for news of the Tau's bold expansion, and the governor's betrayal of the Emperor to reach Terra. The High Lords of Terra sent a message to the Dark Angel's Space Marine chapter who were the closest to the Damocles Gulf. The Space Marine commanders, aware of the firepower of the Tau sent a only a small rapid insertion force to the planet. The force lead by a Librarian and a Chaplain commandeered a scheduled transport ship heading to the planet with supplies to be traded. Once on the planet's surface the bone-coloured warriors gathered intel, their scouts infiltrating slowly and methodically towards the Tau force's gathered information on their deployment, movement and most importantly who their commanding officers were. This last piece of information lacked detail as the Tau commander who had lead her forces against the Dark Eldar was no where to be seen and another Tau commander, in a specialized crisis suit had been seen on numerous occasions. The commandeered transporter remained in low orbit around the hive, the space marines had damaged the vessel so that it needed to be repaired. Deep in the bowels of the ship were squads of elite Deathwing terminators and squads of marines prepared to be fired at the surface in drop pods. In the cover of darkness a small unit of Dark Angel's lead by the Chaplain advanced on a small outpost to the north of the hive. The Tau defenders had little warning as a drop pod came whistling out of the sky and smashed into a ruined cathedral, mere metres from the outskirts of their lines. As the dust settled more Dark Angel troops were seen getting into position in the ruined buildings. From the gutted buildings the space marines suddenly realized that there were more Tau units in their area than previously estimated and that they had walked into a trap. The hunter became the hunted.

Below: The Space Marine scouts bring their rifles to bear on the Riptide, who is already aiming back and spinning up its heavy burst cannon.  photo 11180325_10155521456530183_6369349894479203254_n_zps7dicovek.jpg Dark Angels turn 1

 My opponent rolled a warlord trait that allowed him to infiltrate his HQ and some units. He infiltrated his Chaplain and 2 units of assault marines into my left flank, behind a ruined building. His drop pod comes in behind a ruined building in my centre field without scattering and it unloads 2 combat squads. A rhino tank moves flat out an stops beside the drop pod. Aware of the missile armed broadsides, the Chaplain leads his squad into the ruin on my left flank. The scout snipers on my right flank shoot at the Iontide in my centre field and fail to wound it. A combat squad that had arrived in the drop pod rapid fire their bolters at the squadron of piranha in my centre field and barely scratch the paint. The multimelta in the other combat squad was more successful and scored a penetrating hit, causing the piranha to blow up. The explosion failed to inflict and casualties on the nearby squads. A whirlwind in my opponents backfield launched a barrage of missiles on my broadsides that were out in the open, the missiles miss their target and hit another unit of broadsides who save the wounds. The iontide is hit by krak missiles from the ruin which fail to inflict any wounds. The rest of the devastator squad unleash a barrage of fire from the las cannons and cause 4 wounds on the iontide who's Feel no pain saves 2 wounds, the other 2 go through. The infiltrated combat squads take cover behind the ruin.  photo WP_20150504_11_38_51_Pro_zpsxsjvcvi7.jpg End of Dark Angels turn 1  photo WP_20150504_12_01_19_Pro_zps1qhlb9ng.jpg Tau turn 2

My surviving piranha moves flatout up my left flank towards the uncontested objective. The broadsides in my centre field move to the left to remove get a better shot at the combat squad that came out of the drop pod behind the ruin. The firewarriors holding the objective in my centre field rapid fire their pulse rifles through the building and kill 3 marines. Split firing from the rest of the unit the broadside armed with high yield and smart missiles kill the marine that destroyed the piranha. The two broadsides in that unit shoot at the assault squad in my opponents left flank and kill 2 of them in the ruins. The broadsides that moved out to shoot the combat squad kills the surviving member of the combat squad. The broadsides in the ruin on my right flank open fire at the lascannon team in my opponents centrefield that had wounded the riptide. The riptide in my centrefield rapid fires its plasma rifle into the rhino and blows it up. I jump the riptides back into cover to avoid getting torn to pieces by lascannon and missiles. End of turn 1  photo WP_20150504_12_20_10_Pro_zps42xbmxbb.jpg Dark Angels turn 2

 My opponent's remaining drop pod attempts to come in and mishaps and goes back into reserves (we later find out that the drop pod should be placed in the direction of the scatter but not on the unit that caused it to mishap). Not risking his terminators mishaping my opponent deploys them close to the drop pod, using the ruin as cover. I decide not to shoot at them as I want to save my shooting for my turn. The Chaplain and his assault squads jump out of the ruin and move close to the broadsides. My opponents psyker roles doubles and suffers one wound. The remaining combat squad and the terminators shoot at the iontide and it saves all wounds. The piranha that had moved flat out becomes a bullet magnet and takes 2 hits but saves both thanks to jink and the disruption pods. One broadside close to the assault squads gets cut to shreds by stormbolter fire. As a result of rolling perils the missile devastator squad snap fires at the piranha and fails to damage it. The drop pod shoots at the broadsides in my right flank and takes one wound off the nearest suit. In the assault phase support fire from the fire warriors kills 2 assault marines, the iontide and broadsides fail to wound anything in support fire and overwatch. The surviving assault marines and chaplain get into close combat and wipe out the unit of broadsides. They then consolidate into the ruins to take cover.  photo WP_20150504_12_28_12_Pro_zpsefsmxcam.jpg Tau turn 2

 I roll really well for my reserves and everything but my firewarriors come in. The barracuda comes on my right flank, ready to strafe the terminators and combat squad behind the drop pod. Shadowsun and her bodyguard deep strike close to the unit of terminators. The crisis suit commander and his bodyguard walks on in my centre field. The riptide on my right flank moves up into open ground and I do not nova charge. The other riptide nova charges and I take the ripple fire option. I move the iontide into a better position to shoot at the terminators. In the shooting phase the commander kills 2 assault marines with plasma fire and another two with the cyclic ion blaster. His bodyguard kills 2 more marines with its fusion blasters. The fire warriors on the objective kill 2 more marines with rapid firing pulse weapons. The iontide kills another assault marine and puts a wound on the chaplain. The Barracuda uses the ion cannon blast and kills 1 marine and fails to wound 7 terminators. Shadowsun wounds the chaplain and her unit kills 2 terminators with plasma and fusion fire. The broadside with missiles split fires and kills 2 more assault marines and the two heavy rail rifles finish off the chaplain. The riptide on my right flank fires its heavy burst cannon into the ruin on my right flank and kills 2 assault marines. The broadsides on the ruined building shred the rest of the unit with railgun and missile fire. Shadowsun and her bodyguards move into cover in the ruined building in my left flank.  photo WP_20150504_13_01_19_Pro_zpsvjpjhj9u.jpg              Top of turn 3  photo WP_20150504_13_57_23_Pro_zpsaqutwjou.jpg Dark Angels turn 3 After a devastating round of fire the dark angels drop pod comes in near the piranha and the combat squads gets out. The surviving terminators move through the ruin and get closer to the iontide. The psyker roles perils again and dies. The devestator squad shoots at the barracuda and gets 3 penetrating hits with flakk missiles. I forgot to declare jink and the Barracuda crashes to the ground. The terminators shoot at the firewarriors, killing two of them. The drop pod wounds the riptide in the open and the scouts fail to wound it. Tau turn 3 The riptides move up. Shadowsun and her bodyguard shoot at the terminators from the ruins and the commander and his bodyguard join in, killing all but 1 terminator. The broadsides on the ruins shoot at the whirlwind in my opponents deployment zone blowing it up.  photo WP_20150504_14_11_41_Pro_zpsyc86lf8q.jpg Dark Angels turn 4

 The terminators move up to assault the iontide on the ruin. The combat squads that came out of the drop pod flank the piranha to shoot at the weaker side and rear armour. The scout snipers aim at the riptide in the open and cause one wound but I roll luckily with the feel no pain and ignore the wound. One of the combat squads shoot at the piranha and fail to damage it. The other squad shoots at Shadowsun and her bodyguards in the ruin on my left flank ad fail to cause any wounds. The marine in the ruins shoot at the firewarriors who role luckily with their armor saves. The lascannons in the ruins aim at the iontide and cause 2 wounds, one wound goes through the other is saved with feel no pain. The missiles shoot at the same riptide and fail to wound. In the assault phase the terminator attacks the iontide and and causes a wound that is ignored with feel no pain. The riptide strikes back and pulverizes the terminator.

 Tau turn 4

 The riptide on my right flank nova charges and gets to fire the secondary weapon twice. Every other unit stays in the same place. I don't move the iontide because of the threat from the lascannons and missiles. Pulse fire from the surviving firewarriors kill the last marine in the ruin in my centre field, freeing up the objective behind the ruin. Shadowsun takes aim the drop pod behind the ruin and blows it to pieces. The riptide on my right flank shoots its weapons at the scouts in the ruin and kills one scout with the missiles and another one is shredded by pulse fire. The broadsides on the ruin kill the remaining scouts with missiles. The other unit of broadsides kills one lascannon-armed devastator in the ruins.

 Dark Angels turn 5

 The two combat squads move up towards the piranha and the objective. A krak grenade is thrown at the piranha and blows it up. The other combat squad shoots at shadowsun who is saved by the ruined wall. Both the lascannons and missile launchers let rip at iontide and FNP saves the day for the riptide.

 Tau turn 5

 Sensing victory I move the Iontide up for line breaker, the Commander and his bodyguard move up to the vacated objective and capture it. Shadowsun's bodyguard kill a marine with plasma fire. The iontide kills a devastator in cover and the broadsides on the ruin kill another devastator.

 Tau win 13-6 MVP - Shadowsun, her bodyguard and the Commander and his bodyguard who in turn two nearly single handedly dismantled the dark angels. The Barracuda was underwhelming in this game by only killing 1 marine and failing to injure 7 terminators with the large ion blast. Conclusion This is my third time using this list and it hasn't been beaten yet. I think it is perfect for taking on an infantry heavy list e.g. Space Marines. Going second in this game allowed me to react to my opponents movements and target units that were major threats. I was lucky with the reserves coming in on turn 2 as the combined fire from the different units on the ruins killed a serious amount of threats to my list. I was reluctant in spreading my forces out to much early in the game because I knew my opponent was had deep striking combat squads and fast moving assault squads. Going forward with this list I might drop the barracuda and bring marker lights. Background story Sensing the tables were turning drastically against them the surviving Dark Angel sergeants ordered the remaining brethren to retreat and regroup. As the night fell the broadsides redeployed to the highground and long range sensors scanned the horizon for more incursions but none came, the Dark Angels had been defeated. Commander Shadowsun surveyed her forces and analysed the battle and was pleased that she had only lost a few units and had torn the dark angel force to pieces.

Sunday, April 19, 2015

Tau V Dark Eldar 2k win 13-3

So for this battle report I thought that I would do something a little bit different and add a slight story line to the game. Intro During the Third Sphere of Expansion the Tau captured numerous planets and left garrison's on each planet to maintain supply and trade in the region. Some of these were also used as staging area's for skirmishes into the gulf. In the aftermath of the Battle of Mu'gulath Bay Tau were preparing to move onto nearby worlds. In the build up to this the Tau Ethereal and Planet Governor met on the outskirts of a ruined hive. The Imperial governor's lander gently touched down, recently settled dust from the fighting created a cloud that even the Tau's blacksun filter's struggles to see through. As the pneumatic rams lowered the ramp, crushing a cracked Cadian helmet the Governor and his retinue of storm troopers were immediately met by an Ethereal who was flanked by two crisis suits. A few meter's behind them a slightly smaller individual moved around the ruins and disappear behind a shattered citadel. The body guard's from both unit's set up a defensive perimeter while the two leader's discussed trade negotiations between the Tau and Imperial Guard. In previous meetings on different planets the outcome of these meetings proved to be positive for both parties. Shadowsun and her crisis suit bodyguards crept around the ruins, relaying recon information from the path finders around the perimeter, keeping watch on for anything that jeopardise the negotiations. Hours passed and the sun set behind a ruined manufactorium to the east. As darkness fell contact was lost with the scouts. Shadowsun sensing that the perimeter had been penetrated immediately ordered her broadsides units to scan the horizon. Due to the nature of the terrain and the closing days of the battle no hammerhead or skyray grav-tanks were at her disposal. Shadowsun had numerous xv-88 broadsides, xv-104 riptides, piranhas and numerous Barracuda air superiority aircraft she quickly ordered them into defensive positions. The broadsides took up positions on upper levels of the ruined buildings, with fire warriors covering the streets. The Barracuda's flew defensive patterns, their sensors showed no enemy units in any direction. Shadowsun and her elite crisis team used their jet packs and got on top of a ruined shrine, giving them a full view of the battlefield. The negotiations were adjourned and with the cover of darkness. The Governor and his retinue left the ruined city under an escort of Barracuda fighters. A single Tau Orca transport prepared to leave with the Ethereal and return him to the Kir'la class carrier in orbit. As all of this was happening a 3 man broadside team on the roof spotted fast moving vehicles quickly approaching from the east. Hundreds of feet above Shadowsun detected the Dark Eldar raiders and venoms moving swiftly and silently around the outer ruins. Shadowsun reployed her units and prepared to defend their position. So for this game I decided to change things up a little bit in my list and decided to bring a more infantry and slow moving army that is dug in. I've had great success in the past against the Dark Eldar and wanted a new challenge so I dropped the tanks from my list and decided to use broadside battle suits in my heavy support. I usually take 2 railsides and a missile side in the 1 unit, this time I kept them in the list and added 2 more 3 man teams. Apart from this my list was fairly unchanged I took 3 squads of fire warriors, fireblade, 2 riptides, a barracuda, a squadron of piranha's, shadowsun with bodyguards and another commander and a bodyguard. I removed my path finders to fit in with the fluff above. Deployment 
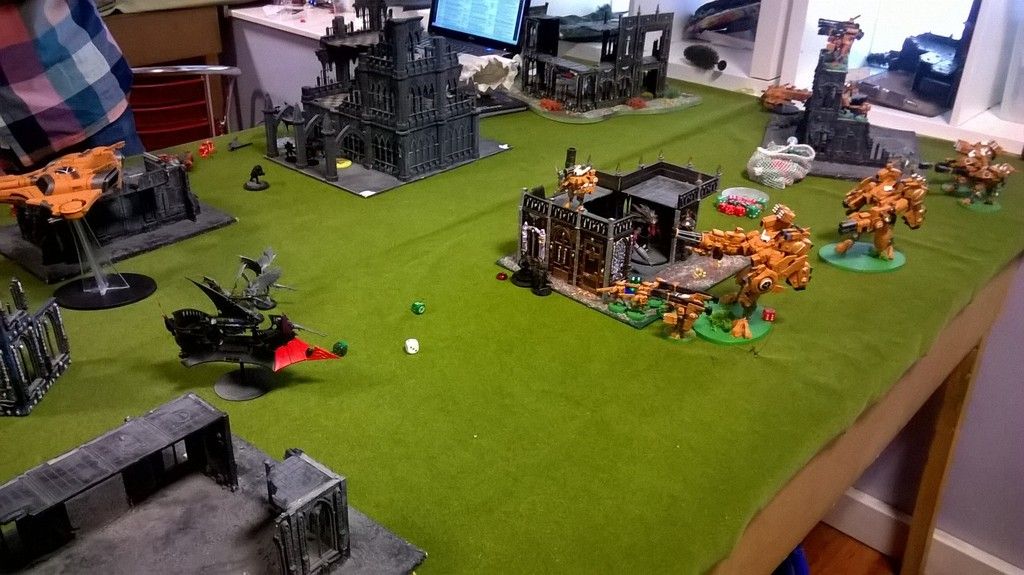
We rolled off and I opted to deploy and go first with night fight. I put the majority of my units on my right flank with a small group in my centre field. The broadsides on top of the building can see the majority of the field. My opponent deployed in corner on the opposite side of the field to me which suited me well. I knew he was going to deep strike a lot of his units so I was hesitant on deploying my army over a large area and kept my units within range of of each other to get the best out of supporting fire.  photo WP_20150413_14_04_07_Pro_zpsazkbkqph.jpg 
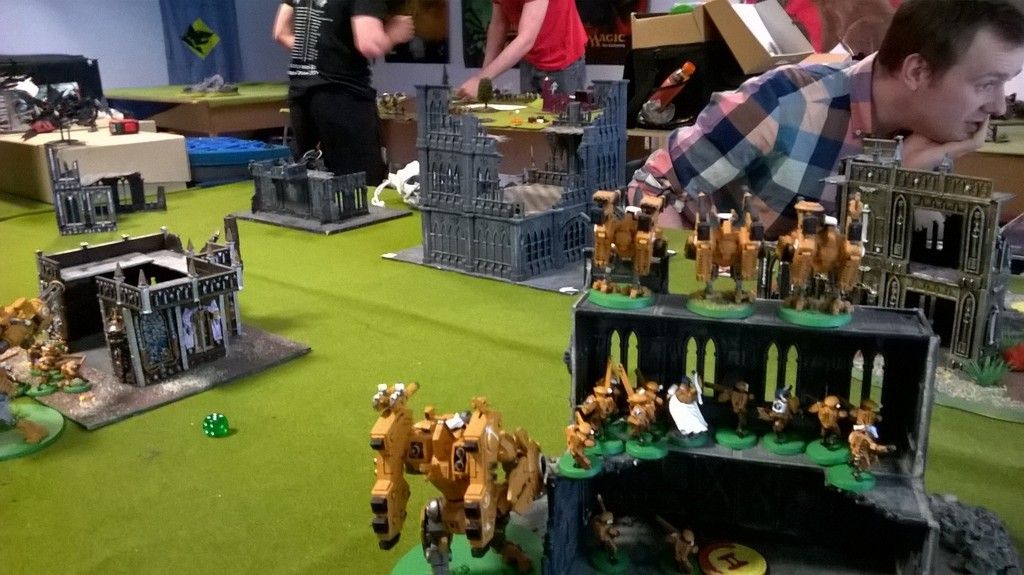
The dark eldar approach from my left flank and come within range of the broadsides and the riptide on the ruined building.  photo WP_20150413_14_07_35_Pro_zps7ipb90xw.jpg Tau turn 1

 My opponent failed to seize the initiative. My opponent' tactics for turn 1 was to minimize my shooting by taking cover behind the ruins and by trying to move up with the cover of darkness from night fight. From playing the DE before I knew that their biggest threat to my army were poison and their very maneuverable transports. I moved a railside towards my left flank and moved the riptide onto the ruined building in the centre to get a clear line of fire on the reaver jet bikes and a ravager. I Nova charged the riptide in the centre and used ripple fire on the twin linked smart missile system to shoot at a ravager in cover, destroying it. The broadsides shoot their railguns at the reavers but miss. Everything else stayed put as I was aware that my opponent was going to deep strike and I didn't want to leave units exposed.

 Dark Eldar 1

The reavers moved up into cover in the ruined building on my left flank with a ravager escort. A raider behind cover attempts to move out and immobilized itself in a ruined building that faced away from my units. The ravager snap fired its disintigrater cannons at the broadsides that had moved out in my turn 1 and killed 1 of them. The surviving members of the team pass their leadership test. The reaver bikes shot at the riptide and put 1 wound on it. Tau turn 2 My crisis suit commander with his bodyguard walk on from reserves and the Barracuda flies on from my right flank and heads straight for the raiding party. The broadsides take revenge on their falling teammate and fire everything at the ravager which passes all of its jink saves. The commander and his bodyguard shoot their weapons at the bikes in the building and kill one of them with hail of plasma and pulse rounds. The other riptide shoots its ion accelerator into the bike unit and takes out another one. More bikes were killed by the barracuda's auto-targeting burst cannon which ignored the bikes cover and jink saves leaving two bikes left. The crisis commander and his bodyguard jump towards my lines.

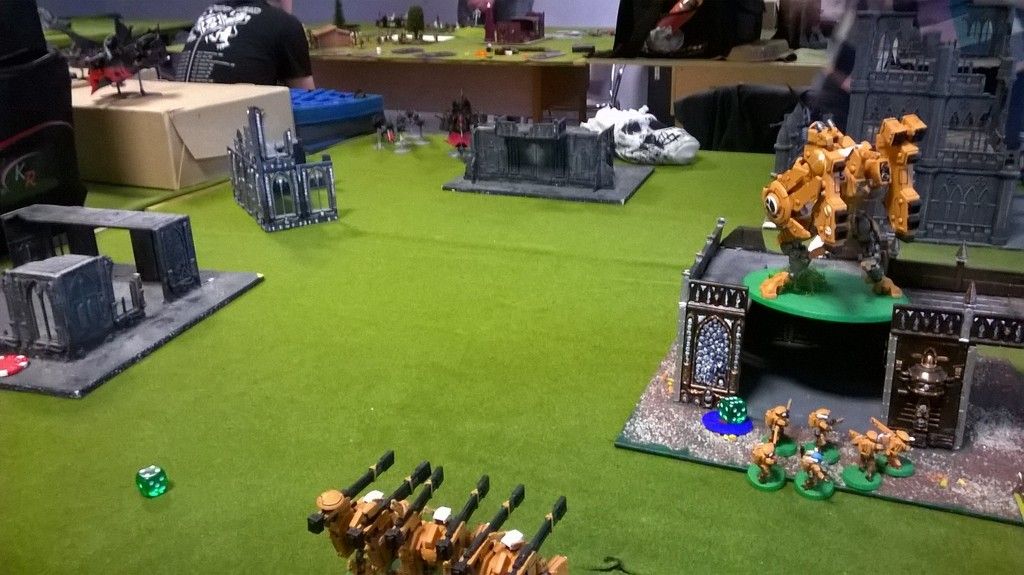
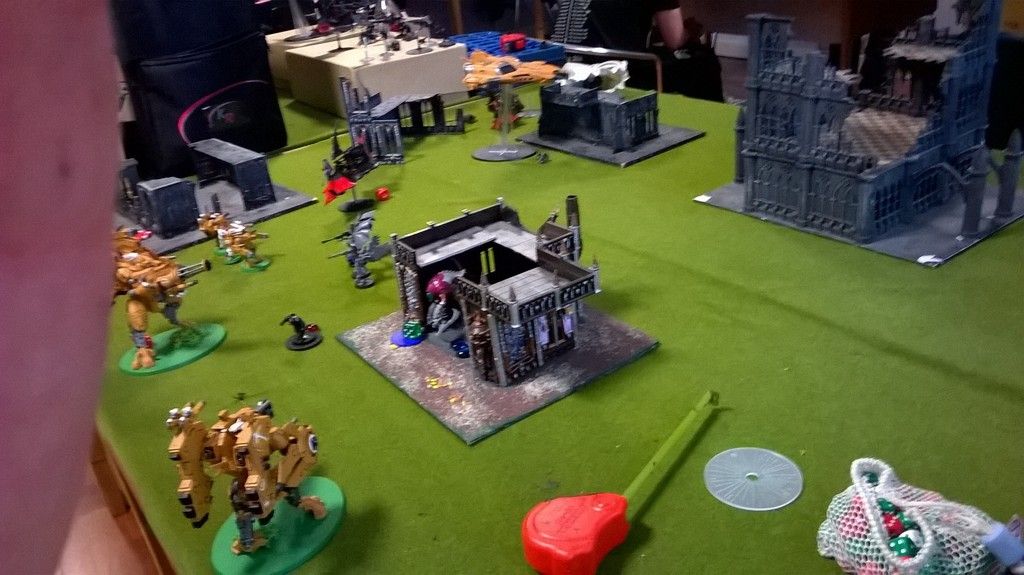
 Shadowsun's Barracuda escort arrives and prepares to fire on the raiding party.  photo WP_20150413_14_29_29_Pro_zpsoluwgqac.jpg The crisis suit commander and his bodyguard walk on in my deployment zone and prepare to obliterate the bikes in cover.  photo WP_20150413_14_29_36_Pro_zpsqbdzo2ir.jpg 
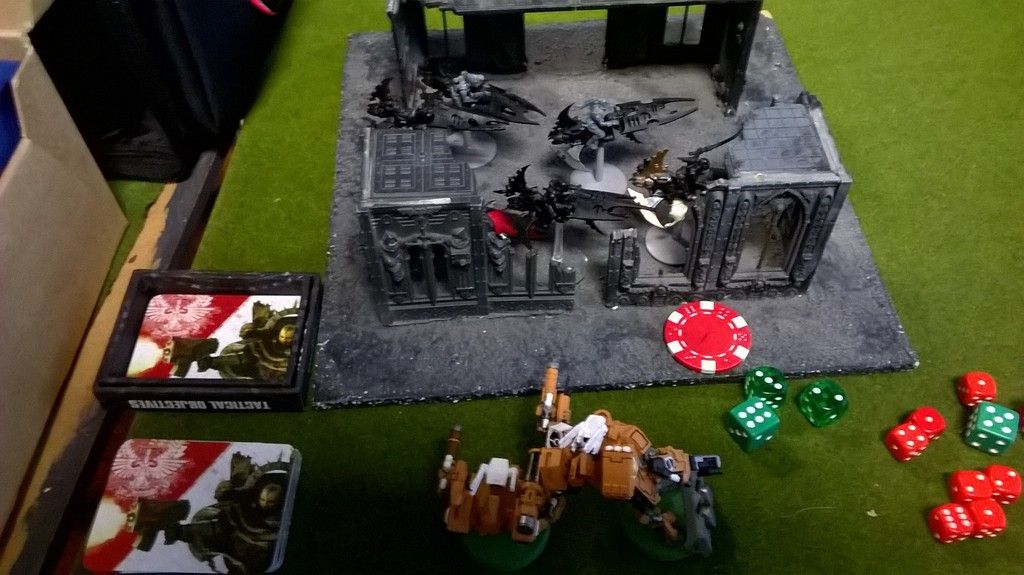
The Dark Eldar Scourges, raider and Archon arrive through the webway portal. The left flank and centre of the table are about to become a hotly contested area.  photo WP_20150413_14_55_01_Pro_zpso6zzwcex.jpg Dark Eldar 2

 The dark eldar reserves arrive through the webway. I thought my opponent would arrive in this area of the table to try to overwhelm as many of my units as quickly as possible to limit my shooting capabilities. The riptide fires its heavy burst cannon at the newly arrived scourages killing three instantly. The venom that immobilized itself shoots at the riptide which saves 9 poisoned wounds. The newly arrived raider obliterates the crisis commander in a hail of 22 shots. Another broadside is killed by a lance from another ravager. The riptide saves another 6 wounds and passes a leadership test from a phantasm grenade. The surviving reaver jet bikes charge at the body guard crisis suits who slaughters one bike in a hail of pulse rounds from the burst cannon in overwatch. The surviving bike makes it into combat with the suit who survives the hammer of wrath attacks. The crisis suit kills the bike in combat and moves towards the ruins near the archon. Tau turn 3 My 6 man fire warrior squad walks onto the table and capture the objective marker in the recently vacated ruin on my left flank. The bodyguard suit moves up onto the ruins above the archon. The Barracuda moves another 18 inches and prepares to fire again. Knowing that my opponent only had one raider that was still in reserve I moved my piranha squadron up my right flank to take on a venom that was taking cover in a ruin and that was contesting an objective. The Barracuda's burst cannons and smart missiles obliterates the ravager that killed the broadside. The broadsides on the building shoot at the venom in the ruined building immobilizing it. The firewarriors, crisis bodyguard, broadsides and riptide fire at the archon and his command unit leaving one body guard left. The piranha's move flat out to deliver the killing blow on the venom.  photo WP_20150413_15_43_23_Pro_zpssd7avswi.jpg Dark Eldar turn 3

 The talos pain engine and the cronos arrive in the ruined building in the centre of my deployment zone. A raider fails to come in and mishaps on its way in and is destroyed, killing the 10 man unit of kalabite warriors in it. The scourges move up and the archon splits from his unit of body guards. The iontide intercepts at the pain engine knocking 2 wounds off it with its ion accelerator. The pain engine fires its flamer and hits four fire warriors, a broadside and a the burst cannon riptide but fails to kill any of them. My opponent obliterates the remaining broadside with a heat lance from the archon.

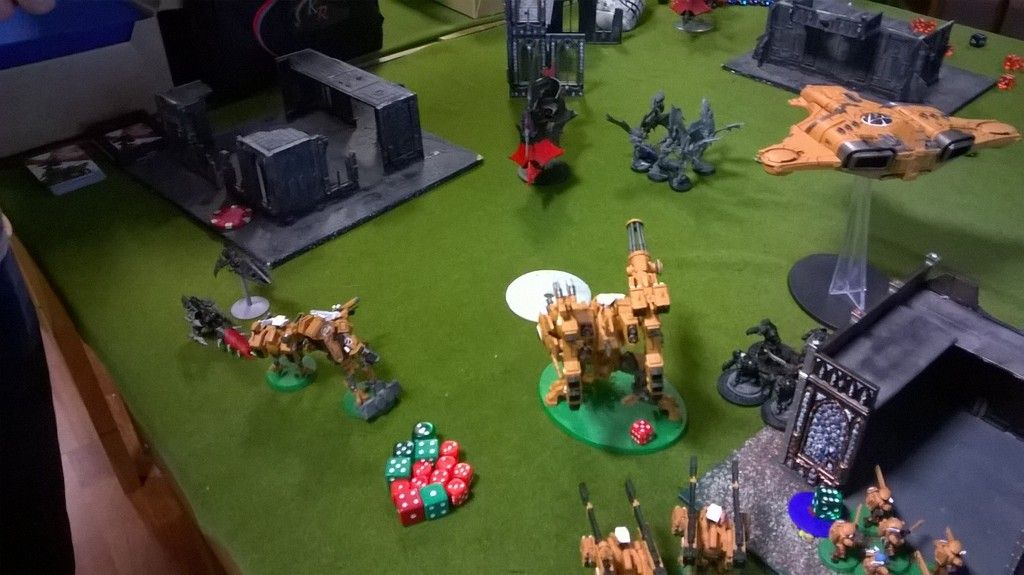
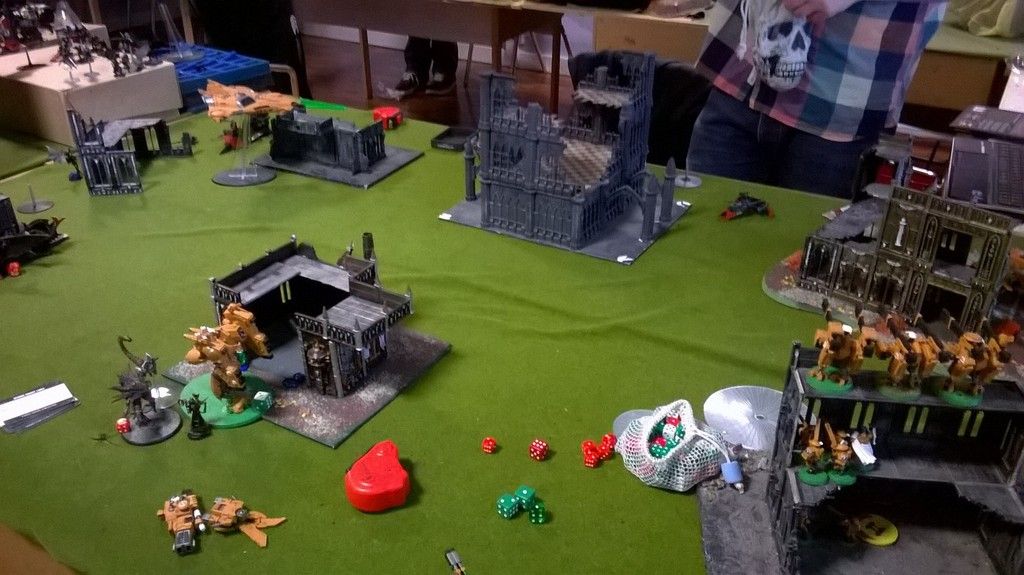
Below. The Dark Eldar at the end of turn 3. photo WP_20150413_16_07_02_Pro_zpsuu67r9xs.jpg Tau turn 4

 Shadowsun, sensing that the battle could be turning against her arrive with her crisis suits. The piranha's move up to get into melta range of the piranha and the riptides move around to get better arc's of fire and the pain engine and the cronos. The broadsides on the ruined building unload on the talos and don't hurt it at all. This scenario repeats itself around the battle field. The piranha's in range of the objective damage the venom with pulse fire from the drones and it is finished off by a fusion blast from the lead piranha. The Barracuda pivots towards the enemy taking cover in a ruined building and switches into hover mood and kills some kabalite warriors that were holding an objective. Shadowsun and her crisis team move into the ruins to get a 2+ cover save from the raider.

 Dark Eldar turn 4

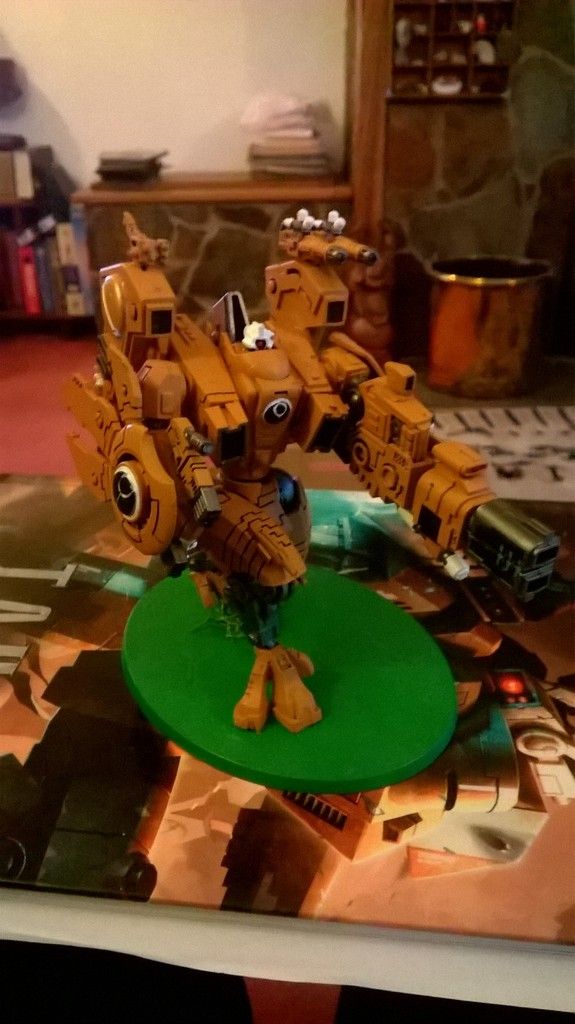
The raider moved into the ruins where shadowsun was holding an objective and the warriors got out. The firewarriors in the ruined building loose a few members and fails it leadership test and run off the table. The dark eldar razorwing arrives automatically from reserve and I choose not to shoot at it with interceptor. My opponent accidentally knocked my Ion tide of the table and it broke into a few pieces (see the photo below). (I decided to keep on playing but was distracted and forgot to take down notes) from my memory the kronos, archon and talos charges the riptide and puts a few wounds on the riptide who jumps away using hit and run.

 The board at the end of turn 4  photo WP_20150413_17_06_59_Pro_zpsqw24tfhy.jpg
Tau turn 5

 The damaged riptide nova charged its ion accelerator and scored a direct hit on the dark eldar commander who failed its 2+ invul save and was killed instantly. The broadsides between the ruined building unload on the razorwing who jinks the rail shots but fails the barrage from the missiles. In total it took 3 glancing and 3 penetrating hits from smart and high yield missiles. The razorwing crashed straight into the ground and failed to damage anything in the crash zone. The hovering Barracuda killed the two remaining kabalite warriors on the objective. I jumped the riptide into the building to protect shadowsun from the kabalite warriors that were probably going to get out of the raider.

 Dark Eldar turn 5

 The kabalite warriors that got out of the raider shoot at shadowsun who makes 9 saves and takes 1 wound. The Iontide nova charges again and puts the kronos down to 1 wound. The scourges charge at the shadowsun who fails to kill them with overwatch but Shadowsun survives the hammer of wrath attacks and fails to wound with the regular attacks. Shadowsun fails to wound and they stay locked in combat. We roll to see if the game continues and it ends on a 1. I win the game 13-3 due to slay the warlord, first blood, line breaker and by scoring objective cards.

 MVP of the game is a tie between the two riptides and the Barracuda. Barracuda - killed 2 bikes, a unit of kabalite warriors and a ravager Burst cannon riptide - killed 2 vehicles and a few infantry. It also acted as a bullet magnet throughout the game and survived numerous poison shots. Ion accelerator riptide - Annihilated the warlord, killed a few of the bikes and some troops in different units. Conclusion I really enjoyed this game and enjoyed playing with the objective cards. Having the two castles with over lapping arc's of fire helped me put my heavy weapons on the biggest threats and other units to shoot at other units. This was my second time with this list (the first was against a space marine army and it was a little one sided due to 8 str 8 ap 2 shots per turn as well as plasma and fusion). In this game the line of sight and maneuverability of some units helped me dominate different area's of the board. From playing previous games against the Dark Eldar I knew I had to kill the vehicles quickly to remove their speed which were practically made of paper. I like the new webway portal rules for them it gives them a chance to get into combat quickly especially with the focus on shooting, if you go through previous batreps you'll see that once the vehicles were destroyed my opponent had a hard time getting into combat without taking a lot of fire. It also reflects the fluff that the dark eldar are very quick and mobile. If using this list again against a horde (nids/orks) or against an army with a lot of shield saves (eldar/dark eldar) I'd try to bring more smart and high yield missiles that ignore cover saves. This list is better against an army like space marines that have good armour saves, that won't have as many units and aren't as quick around the board. Overall this was a good game and the damaged riptide wasn't badly damaged and is ready to fight again. I know my opponent was really upset over the incident and there are no hard feelings. We'll be playing again.  photo WP_20150419_20_46_32_Pro_zpsjc4lmlsj.jpg

Saturday, April 11, 2015

Tau V Dark Angels 2000pt game loss 13-7

 photo WP_20150322_12_32_15_Pro_zps80segg0k.jpg My army ready to begin shelling the Dark Angels.  photo WP_20150322_12_32_26_Pro_zpsskjgpkqc.jpg The Swordfish ready to start its first battle

 Turn 1

 I won the roll off and opted to deploy first and go first. There was no night fight and my opponent failed take the initiative. I moved my squadron of piranhas up the left flank to manoeuvre into position behind the vehicles. The hammerheads started moving towards my left flank but remained behind the ruined building to maximize cover and to get a better arc of firing on the enemy tanks behind the ruined building. Both riptides nova charged their primary weapons. The pathfinders in the ruined building on my left flank lit up the scouts hiding in the adjacent building and reduced their cover saves and increased the broadsides bs. The missileside in the unit kills 1 scout and the railsides blast 2 more to pieces. The other squad lit up a tank and increased the hammerheads bs which knocked a hull point off a rhino. Longstrike stuns a razorback behind a ruin on my right flank. The Swordfish hits a rhino but fails to damage it. The burst-tide kills 1 marine in cover and the iontide fires a nova blast but it scatters. Riptides move up.  photo WP_20150322_14_13_43_Pro_zpsdsaksqbz.jpg

 The Hammerhead's take up position behind a ruin to begin trading blows with the Dark Angels armour.

 Dark Angels turn 1

 Drop pod comes in on my left flank. A razor back comes up my right flank and the damaged rhino comes up the centre. Psyker roles presience and gets perils and suffers a wound, razorback shoots at the ion tide who gets his invul save. 3 missiles from the devestator squad in the ruins hit the ion tide and it takes 1 wound. Pathfinders loose 1 guy to bolter fire and another is saved from cover. The ion tide takes 1 wound and a lot are saved. On my left flank I loose 2 firewarriors, piranhas are ok after bolter fire. The iontide survives sniper fire. I loose 1 piranha to bolter fire and 1 plasma marine dies, the burst tide is hit by the land raider's lascannons but gets the invul.  photo WP_20150322_12_53_46_Pro_zpsvddfsmng.jpg

The vets arrive in the drop pod into what will a hotly contested corner.

 Tau turn 2

 Shadowsun and friends walk on to reinforce my left flank and to avenge the 2 warriors who had been killed. Both riptides nova charge their primary weapons, tanks move around a bit, pathfinders strip the save from the scouts the missileside kills the remaining scout and the broadsides blow up the damaged rhino. Longstrike fails to damage a tank. The burst tide kills a tank with its primary gun, the swordfish fails to do any damage and the ion tide kills 3 marines with the ion accelerator, shadowsun and friends kill 2 marines with fusion and plasma blasts. They then move into cover using their jump packs.

 Dark Angels turn 2

The terminators deep strike in my left flank, perils kill the other warlord giving me slay the warlord and a victory point. The burst tide interceptors the stormtalon with its heavy burst cannon and stuns it. Intercepting broadsides kill 1 terminator with plasma fire, pathfinders die and 1 unit of fire warriors takes a beating, pathfinders die. Tau 3 I decide to nova charge both riptides and both guns are charged, tanks shuffle a bit more to respond to my opponents movements. The burst tide kills the stormtalon and terminators die to fire from shadowsun and the broadside, swordfish damages a tank, hammerheads fail to do anything, the burst tide jumps up towards the ruin to engage the marines in combat.  photo WP_20150322_13_37_09_Pro_zpsdyr1ql8s.jpg Shadowsun and her bodyguard reinforce my left flank and begin killing the terminators.

Dark Angels turn 3

 Tanks move up, vets fail to come in.

 Tau turn 4
Swordfish blows up a razorback, the explosion kills a marine. Broadside kills 2 terminators, shadowsun kills a tank. The burst tide becomes locked in combat with the marines on the ruined building.  photo WP_20150322_14_46_26_Pro_zpsdadnf7pw.jpg Swordfish has the razorback lined up, ready to deliver the killer blow and receive its fist tank kill.

Dark Angels turn 4

 Vets deep strike and a blast from the Ion tide kills 3 meltas marines, I risked the blast scattering back onto the Iontide who was only 3 inches away. Swordfish takes a beating from various units but gets away and only took 1 glancing hit. Tau 5 Kill 1 marine from pulse fire, 4 marines die to commander and a crisis suit. After my 5th turn I my phone died so I was unable to take down more notes. It was a good game.